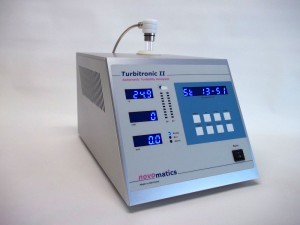
Turbitronic II
24 พฤษภาคม 2566
ผู้ชม 140 ผู้ชม
Turbitronic II
Surface active agents like surfactants are generally showing a specific turbidity behaviour. The classic method to determine turbidity is by visual observation, but the visual method is inaccurate and time consuming.
For such applications the development of the turbidity analyzer Turbitronic II is a fundamental improvement regarding accuracy, reproducibility, efficiency and cost savings. In addition to this, severe errors in case of unknown phenomena like for instance dragging turbidity or opacity, can be avoided by automatic turbidity measurements.
Automated Measuring Solution for liquid detergents and surfactants
- fully automatic characterization of non-ionic surfactants according to DIN/EN 1890 and ISO 0607 standards
- programmable temperature profiles and stirring rates
- quick method, takes typically 2 min for clearpoint determination
- for use with standard glassware
- calibrated turbidity range
- automatic storage of test results
- optional data printer and PC
- compact design
In principle, the method is based on automatic turbidity detection by light transmission. Infrared light is transmitted through the sample under test and is detected by a highly sensitive photoelectric sensor on the opposite side. The intensity level on which turbidity is detected can be adjusted over a wide range.
In many cases, not only cloudpoint measurements but also clearpoint measurements can be of interest. By a smart temperature program the TURBITRONIC II is capable to determine both cloudpoints and clearpoints fast and accurately.
Variable heating and cooling rates can be achieved by accurate electronic temperature control within the entire range of -15°C up to +90°C. The test procedure can exactly be arranged to comply to the international test standards (DIN, ISO, ASTM) for turbidity testing of various liquids. This method complies also to the DIN/EN 1890 and ISO 0607 standards and improve precision, repeatability, reproducibility and effectiveness of this test method.
Zero and span of the measuring range can be calibrated by turbidity standards (for instance Formazin). Furthermore, the sensitivity of the turbidity sensor can be checked regularly in order to assure the accuracy and reliability of the instrument. Alternatively, turbidity measurements can be carried out in relation to as user defined standard (ratio-method). This kind of turbidity measurements is much more difficult by visual comparison.


