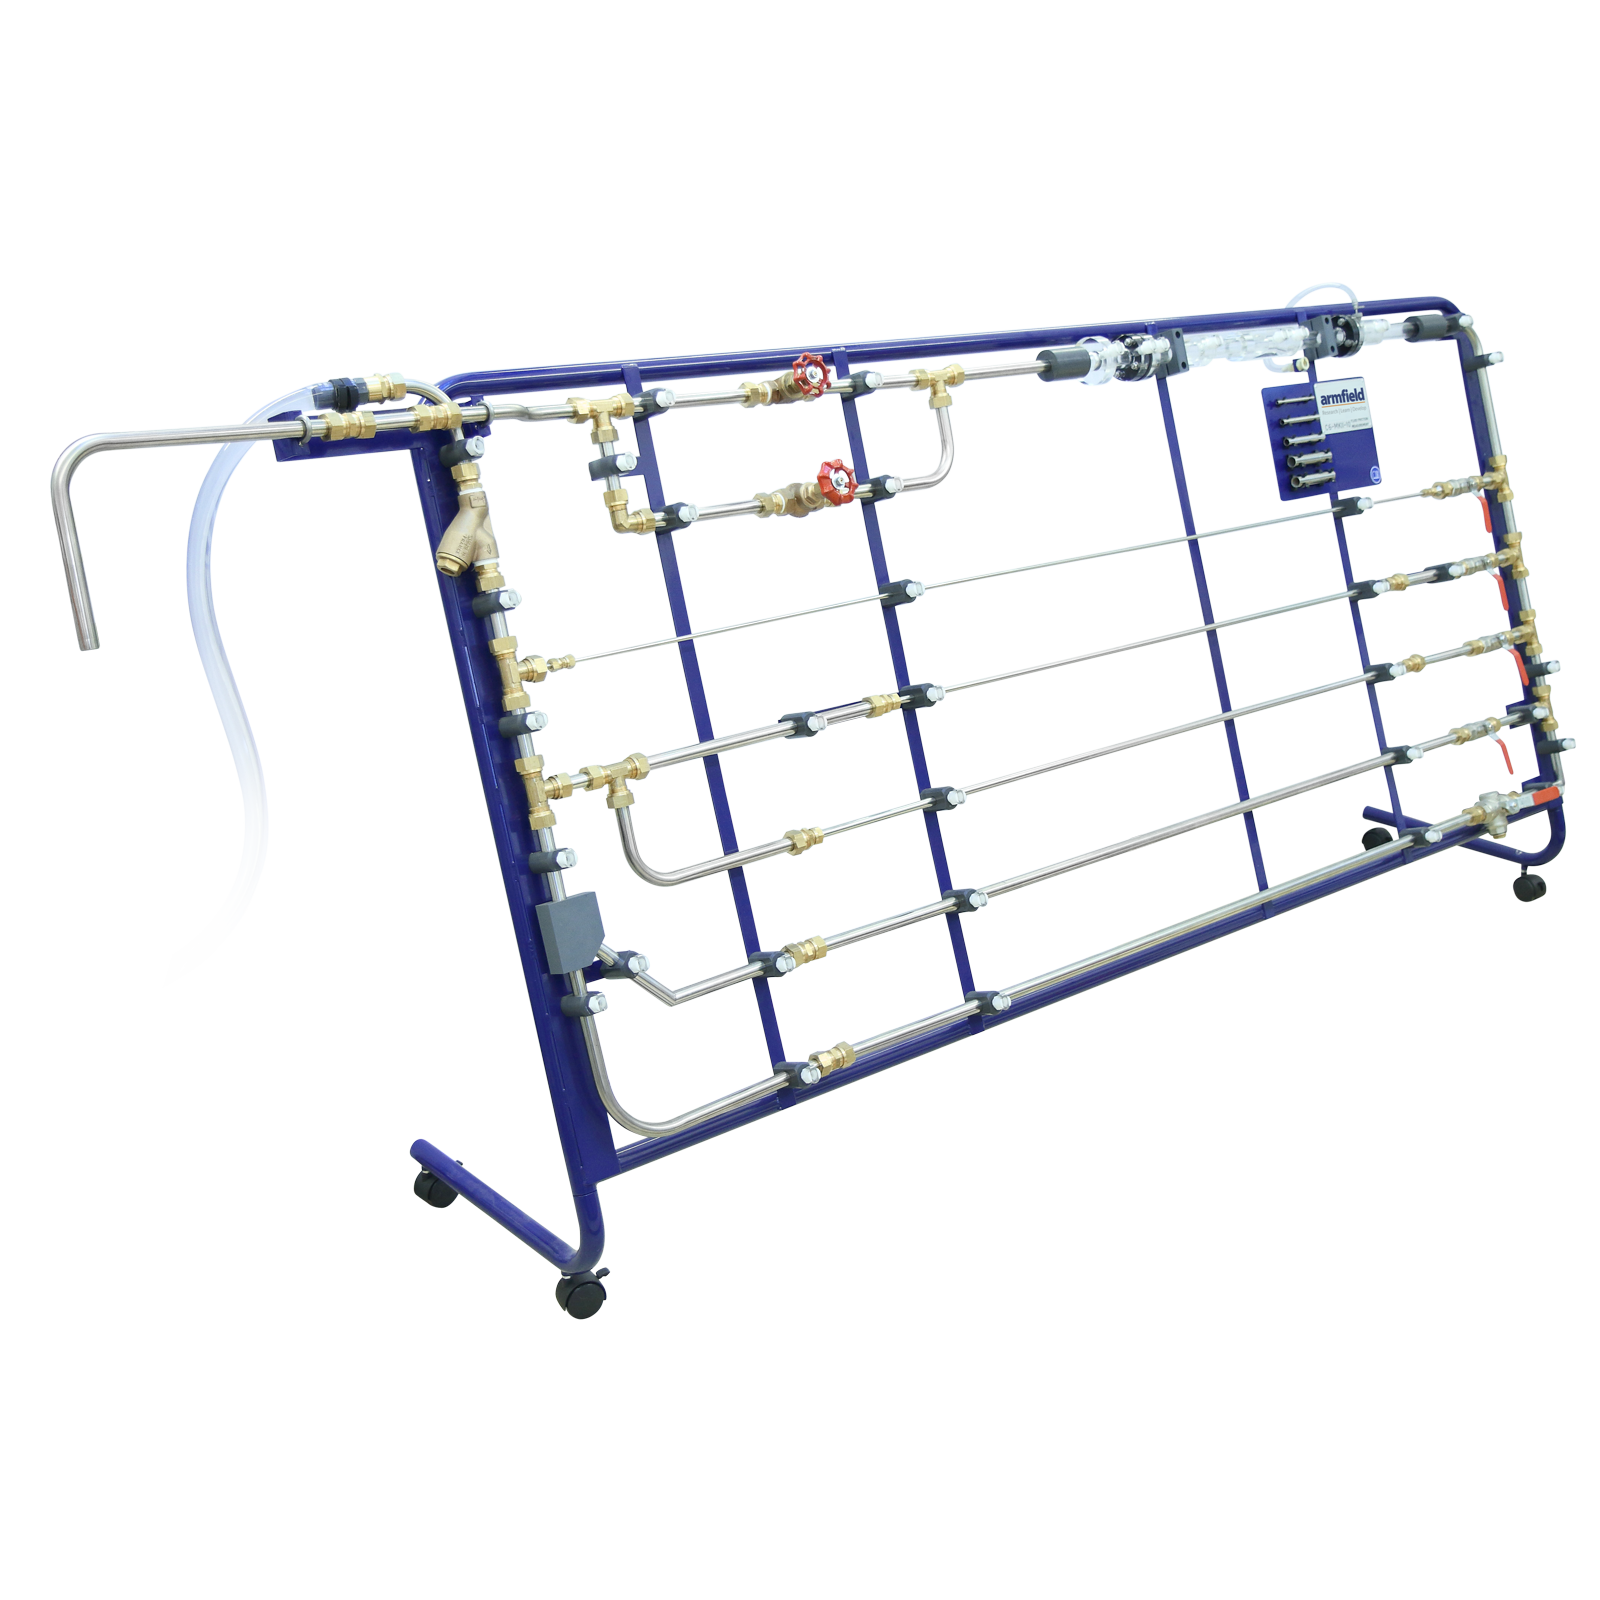
Fluid Friction Measurements
26 พฤษภาคม 2566
ผู้ชม 611 ผู้ชม
DESCRIPTION
The Armfield C6-MKII-10 Fluid Friction Measurements unit provides facilities for the detailed study of fluid friction head losses, which occur when an incompressible fluid flows through pipes, fittings and flow metering devices.
Pipe friction is one of the classic laboratory experiments and has always found a place in the practical teaching of fluid mechanics.
With this unit, friction head losses in straight pipes of very different sizes can be investigated over a range of Reynolds’ numbers from10³ to nearly 10⁵. This covers the laminar, transitional and turbulent flow regimes in smooth pipes.
In addition an artificially roughened pipe is supplied, which at the higher Reynolds’ numbers shows a clear departure from the typical smooth bore pipe characteristics.
In addition to the equipment for the study of losses in straight pipes, a wide range of accessories are included such as pipe fittings and control valves, a Venturi tube, an orifice plate assembly and a Pitot tube.
An arrangement of six pipes provides facilities for testing the following:
- Four smooth bore pipes of different diameters
- Artificially roughened pipe
- 90° bends (large & small radii)
- 90° elbow
- 90° mitre
- 45° elbow
- 45°Y
- 90°T
- Sudden enlargement
- Sudden contraction
- Gate valve
- Globe valve
- Ball valve
- Inline strainer
- Perspex venturi
- Perspex orifice meter
- Perspex pipe section with a pitot tube & static tapping
Short samples of each size test pipe are provided loose so that the students can measure the exact diameter and determine the nature of the internal finish.
The ratio of the pipe diameter to the distance of the pressure tappings from the ends of each pipe has been selected to minimise end and entry effects. A system of isolating valves is provided whereby the pipe to be tested can be selected without disconnecting or draining the system. This arrangement enables tests to be conducted on parallel pipe configurations.
An optional floor-standing Hydraulics Bench incorporates a sump tank and volumetric flow measurement facility. Rapid and accurate flow measurement is possible over the full working range of the apparatus.
The level rise in the measuring tank is determined by an independent sight gauge. A 250ml capacity glass measuring cylinder is supplied for measuring the flow rate under laminar conditions (very low flows).
Each pressure tapping is fitted with a quick action self-sealing connection. Probe attachments with an adequate quantity of translucent polythene tubing are provided so that any pair of pressure tappings can be rapidly connected.
All the test pipes and fixed interconnecting pipes are fabricated in stainless steel.
Technical details for test pipes:
Diameter:
1. 19.1mm OD x 17.2mm ID
2. 12.7mm OD x 10.9mm ID
3. 9.5mm OD x 7.7mm ID
4. 6.4mm OD x 4.5mm ID
5. 19.1mm OD x 15.2mm ID (Roughened)
Distance between tappings: 1m
Number of tapping points: 38
EXPERIMENTAL CONTENT
-
A wide range of measurements, demonstrations and training exercises are possible with the equipment:
- Confirming the relationship between head loss due to fluid friction and velocity for flow of water
- Determining the head loss associated with flow through a variety of standard pipe fittings
- Determining the relationship between pipe friction coefficients and Reynolds’ number for flow through a pipe with roughened bore
- Demonstrating the application of differential head devices in the measurement of flow rate and velocity
- Providing practical training of pressure measurement techniques
- Enhancing understanding of the hydraulic principles involved through the use of complementary computer software


